Installing, Connecting and Testing the Onboard 88 Volt Charger and DC-DC Converter 13.8 volt Charger.
- evconversionrider
- Mar 30
- 3 min read
The final step in the bike's electrical installation is setting up the 88-volt charger for the main batteries and the DC-DC converter to charge the 12-volt bike battery.
You might wonder why it's necessary to have two battery systems on the bike when a DC-DC Converter could be used to power the lights and horn. According to the EV Conversion Guidelines, a separate 12-volt system must be in place, distinct from the EV Traction Drive system batteries. This ensures that all safety systems, lights, and the horn will continue to function in the event that the EV Traction batteries fail or become depleted.
This is relevant to all electric vehicles, including new models, since they all rely on a 12-volt battery to ensure safety systems like lights, brake boosters, and park brakes remain functional if the main battery fails.
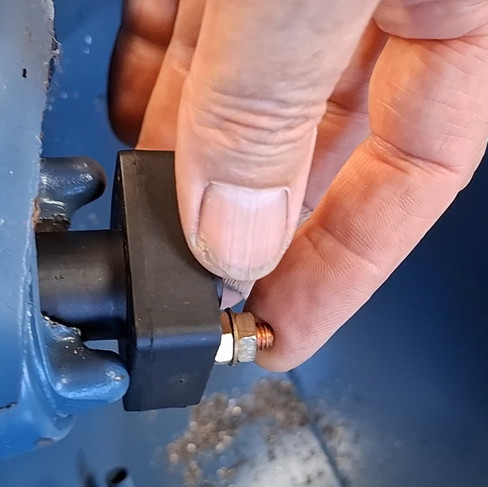
The first stage of the installation is setting up the 88-volt charger, which enables us to measure and cut the cable connecting to the main batteries to the correct length.
I will use the extra cable from the charger to connect the DC-DC Converter to the bike's 12-volt battery.
Once I have measured and cut the charge cable, I will also run the 240 volt power cable for the charger through the bike and place the plug under the Rear Seat.
Before installing the Main Charger isolation switch on the tank, I will use the cable I cut from the main charge to connect the DC-DC Converter to the bike's 12-volt battery. The DC-DC Converter will replace the bike's alternator and will charge the bike battery at 13.8 volts. First, I will mount the unit on the side of the battery box, trimming the screws so they do not extend into the battery box.
Now that the DC-DC Converter is installed and the cable is linked between the Converter and the battery through a 20 amp fuse, I can proceed to test the converter's functionality as it charges the bike's battery.
With the successful test of the converter, I can now start replacing the fuel valve on the tank's side with a new switch. To simplify tank removal for servicing, I will add an Anderson Plug to the circuit, allowing the tank switch to be disconnected from the bike.
I spoke with the charger suppliers, and they told me that it's okay to leave the charger connected to the batteries while using the bike. However, I would still like the option to disconnect the charger when it's not needed.
Initially, I'll drill a pilot hole at the center of the tank's valve. Next, I'll use a 25mm hole saw to cut a hole in the tank that is large enough for the switch to fit through.


Now that the switch fits through the new hole, I need to grind the back of the hole so the isolation switch can sit flat against the tank.
While aligning the switch to mark the fixing holes, I discovered that the existing screw holes aligned perfectly diagonally. This would result in only having two bolts securing the switch in place, but since there is no pressure on the switch, I believe this should suffice.
Before connecting the cables to the switch, I will position the tank on the bike to verify the clearance between the structures beneath the tank.
Fortunately, we can view the switch through the fuel filler with the tank installed in place.
Now that we are confident the connections are free of any obstacles, we can proceed to attach the cables and Anderson plug to the switch, completing the circuit between the charger and the fuse that connects directly to the battery.
I have once more added the orange sleeve to the cable and ordered some silicone lug covers to fit over the terminals, ensuring that there will be no exposed connections once the bike is finished.
With all the wiring for the chargers now finished, I can install the tank and test the charger's operation for the first time since I conducted a bench test on the battery pack a while back.
With the charger test being successful, I can now begin tidying up the wiring to ensure all cables are secure and clear from any damage.
In our upcoming blog, we will go through the bike to make sure everything is finalised as we complete the assembly of the new CBR-EV-R.


Comments